


A cryptocurrency trading platform built with ASP.NET Core and React for running, monitoring, and visualizing automated trading strategies in real time, with deployment support for Azure App Service and Azure Static Web Apps.
- Real-time strategy monitoring
- Low-latency real-time trade and market data streaming via SignalR
- Interactive TradingView charts
- Auth0 authentication and authorization
- Role-based access control
- Configurable trading strategy execution
- Cloud deployment support using Azure App Service and Azure Static Web Apps

- Features
- Architecture
- Getting Started
- Running a Strategy
- Azure Deployment
- Deploying the Vite + React Web Application
- Deploying the ASP.NET Core Web API
- Disclaimer
- License
- Roadmap
Cryoptix consists of:
- React + TypeScript SPA
- shadcn/ui
- TradingView Charting Library
- ASP.NET Core Web API
- SignalR real-time messaging
- Auth0
- OAuth 2.0
- Azure Static Web Apps
- Azure App Service
- GitHub Actions
- .NET 10
- ASP.NET Core
- SignalR
- React
- TypeScript
- shadcn/ui
- TradingView Charting Library
- Auth0
- Azure App Service
- Azure Static Web Apps
- GitHub Actions
This section describes the steps to get Cryoptix running in a local development environment.
- .NET 10 SDK
- Node.js 22+
- npm
- Auth0 account
- Exchange API credentials (optional)
- Azure account
- Azure CLI (optional)
- GitHub account
git clone https://github.com/grantcolley/cryoptix.git
cd cryoptix
React UI
npm install
ASP.NET Web API
dotnet restore
Cryoptix uses Auth0 for authentication and authorization. The implementation is based on OAuth 2.0 and can be adapted to other compatible identity providers.
Auth0 offers a free tier and provides an easy-to-use dashboard for registering applications, managing roles, and creating users.
Login to Auth0 and navigate to the Dashboard. In the sidebar select Applications > APIs. Click on the + Create API button and provide the name Cryoptix.API.

In the Permissions tab, create a new permission read:cryoptix-user. Users will need to be assigned this permission to access the Cryoptix API.

In the sidebar select Applications > Applications. Click on the + Create Application button, provide the name Cryoptix, and select Single Page Web Application.

In the section Application URIs, add the default localhost http://localhost:5173/.

In the sidebar select User Management > Roles. Click on the + Create Role button. Provide the name cryoptix-user-read and description Cryoptix user read role.

In the Permissions tab, click Assign Permissions. Select Cryoptix.API from the drop down list, and select read:cryoptix-user to assign the permission to the role.

Assign this role to any user who should have access to the Cryoptix application.
In the sidebar select User Management > Users. Click on the + Create User button and select Create via UI. Provide an email address and password.

In the Permissions tab, click Assign Permissions. Select Cryoptix.API from the drop down list, and select read:cryoptix-user to assign the permission to the user.
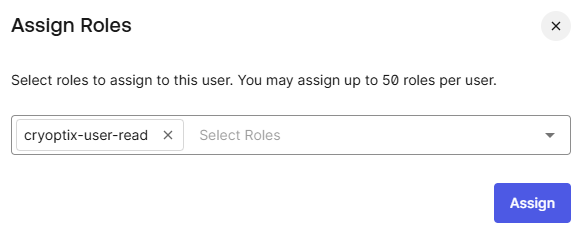
In the Roles tab, click Assign Role. Select cryoptix-user-read from the drop down list to assign the role to the user.
In the Cryoptix.Web.API project, update appsettings.json with Auth, and CorsOrigins values.
{
  "Serilog": {
    "Using": [ "Serilog.Sinks.Console", "Serilog.Sinks.File" ],
    "MinimumLevel": {
      "Default": "Warning",
      "Override": {
        "Microsoft": "Warning",
        "System": "Warning"
      }
    },
    "Enrich": [ "FromLogContext" ]
  },
  "AllowedHosts": "*",
  "Auth": {
    "Domain": "auth_domain", 👈
    "Audience": "auth_api_audience", 👈
    "Issuer": "auth_issuer", 👈
    "ClientIds": [
      "auth_application_client_id" 👈
    ]
  },
  "Credentials": {
    "AccountName": "your_account_name", 👈
    "ApiKey": "exchange_api_key", 👈
    "ApiSecret": "exchange_api_secret" 👈
  },
  "CorsOrigins": {
    "Policy": "local",
    "Urls": "http://localhost:5173" 👈
  },
  "StrategyChannelOptions": {
    "KlineCapacity": "1000",
    "TradeCapacity": "20000",
    "TradeFullMode": "2",
    "KlineFullMode": "2",
    "KlineBroadcastCapacity": "5000",
    "TradeBroadcastCapacity": "10000",
    "IndicatorsBroadcastCapacity": "5000",
    "SignalBroadcastCapacity": "5000",
    "KlineBroadcastFullMode": "2",
    "TradeBroadcastFullMode": "2",
    "IndicatorsBroadcastFullMode": "2",
    "SignalBroadcastFullMode": "2"
  }
}In the Cryoptix UI project, update .env with Auth configuration values shown below.
VITE_AUTH_DOMAIN=auth_domain   👈
VITE_AUTH_CLIENT_ID=auth_application_client_id   👈
VITE_AUTH_AUDIENCE=auth_api_audience   👈
VITE_API_ROUTE_STATUS=api/strategy/status
VITE_API_ROUTE_START=api/strategy/start
VITE_API_ROUTE_STOP=api/strategy/stop
VITE_API_ROUTE_UPDATE=api/strategy/update
VITE_API_ROUTE_SUBSCRIBE=api/strategy/subscribe
dotnet run --project Cryoptix.Web.API
npm run dev
The application will be available at:
http://localhost:5173
Click the login icon in the upper-right corner of the application.

You will be redirected to Auth0 to authenticate.

After successful authentication, the navigation panel is displayed. Select a Strategy from the menu.
Enter the server URL and click the Connect to Server button.

Select a strategy from the dropdown list.

Click Start Strategy to begin execution.
Cryoptix UI

Cryoptix API

Create an Azure account using the free tier.
The file public/staticwebapp.config.json enables client-side routing for the React application.
Without this configuration, refreshing or directly navigating to a route such as /strategies/foo would return a 404 from Azure Static Web Apps. The navigationFallback rule ensures that unmatched routes are rewritten to index.html, allowing React Router to handle navigation.
{
  "navigationFallback": {
    "rewrite": "/index.html",
    "exclude": ["/assets/*", "/icons/*", "/favicon.ico", "/favicon.svg", "/manifest.webmanifest"]
  },
  "mimeTypes": {
    ".webmanifest": "application/manifest+json"
  }
}
Create an Azure Static Web App using the following settings:
- Hosting Plan:
Free - Deployment Source:
Other
Log in to Auth0 and open the Cryoptix application configuration.
Under Application URIs, add the Azure Static Web App URL.
Important
Failing to add the Azure Static Web App URL will prevent users from authenticating successfully.
The workflow file .github/workflows/azure-static-web-apps.yml is configured for manual deployment and is automatically available in GitHub Actions.
name: Azure Static Web Apps

on:
  workflow_dispatch:

jobs:
  build_and_deploy:
    runs-on: ubuntu-latest
    name: Build and deploy
    env:
      VITE_AUTH_DOMAIN: ${{ vars.VITE_AUTH_DOMAIN }}
      VITE_AUTH_CLIENT_ID: ${{ vars.VITE_AUTH_CLIENT_ID }}
      VITE_AUTH_AUDIENCE: ${{ vars.VITE_AUTH_AUDIENCE }}
      VITE_API_ROUTE_STATUS: ${{ vars.VITE_API_ROUTE_STATUS }}
      VITE_API_ROUTE_START: ${{ vars.VITE_API_ROUTE_START }}
      VITE_API_ROUTE_STOP: ${{ vars.VITE_API_ROUTE_STOP }}
      VITE_API_ROUTE_UPDATE: ${{ vars.VITE_API_ROUTE_UPDATE }}
      VITE_API_ROUTE_SUBSCRIBE: ${{ vars.VITE_API_ROUTE_SUBSCRIBE }}
    steps:
      - name: Checkout
        uses: actions/checkout@v4

      - name: Build and deploy
        uses: Azure/static-web-apps-deploy@v1
        with:
          azure_static_web_apps_api_token: ${{ secrets.AZURE_STATIC_WEB_APPS_API_TOKEN }}
          action: upload
          app_location: src/gui
          api_location: ""
          output_location: dist
app_build_command: npm run buildNavigate to:
GitHub → Repository → Settings → Secrets and variables → Actions
Create the following repository secret:
| Secret Name |
|---|
AZURE_STATIC_WEB_APPS_API_TOKEN |
Copy the Azure Static Web App deployment token into this secret.
Create the following repository variables:
| Variable Name | Value |
|---|---|
VITE_AUTH_DOMAIN |
your_auth0_domain |
VITE_AUTH_CLIENT_ID |
your_auth0_app_client_id |
VITE_AUTH_AUDIENCE |
your_auth0_api_audience |
VITE_API_ROUTE_STATUS |
api/strategy/status |
VITE_API_ROUTE_START |
api/strategy/start |
VITE_API_ROUTE_STOP |
api/strategy/stop |
VITE_API_ROUTE_UPDATE |
api/strategy/update |
VITE_API_ROUTE_SUBSCRIBE |
api/strategy/subscribe |
- Open GitHub Actions
- Select Azure Static Web Apps
- Click Run workflow
- Select the target branch.
- Click Run workflow.
GitHub Actions will build, publish, configure, and deploy the React SPA application to Azure Static Web Apps.

Tip
How GitHub Actions + Vite interact
1. GitHub Actions starts a workflow
GitHub provisions a clean Linux build environment and checks out the repository.
The environment contains:
- Node.js
- Repository source code
- Repository secrets
- Repository variables
2. GitHub Actions Provides Environment Variables
The workflow injects the configured variables into the build environment:
env:
  VITE_AUTH_DOMAIN: ${{ secrets.VITE_AUTH_DOMAIN }}
  VITE_AUTH_CLIENT_ID: ${{ secrets.VITE_AUTH_CLIENT_ID }}
3. Vite Builds the Application
GitHub Actions executes:
npm run build
During the build, Vite:
-Reads environment variables
-Exposes them through import.meta.env
-Executes configuration validation
-Produces the final static assets in dist/
4. Azure Receives the Built Application
The deployment step uploads the generated dist/ folder to Azure Static Web Apps.
Azure only receives the final compiled static assets and does not execute the application build process itself.
GitHub Actions must authenticate to Azure before deploying resources. Microsoft recommends using OpenID Connect (OIDC), which allows GitHub Actions to authenticate without storing long-lived client secrets.
The authentication flow is:
GitHub Actions
    ↓
Requests short-lived identity token from GitHub
    ↓
Azure validates the token
    ↓
Azure issues temporary access token
    ↓
Deploys to Azure App Service
Before deploying, create:
- Microsoft Entra ID App Registration
- Federated Credential
How to configure GitHub OIDC for Azure App Service deployments
- Open the Azure Portal.
- Navigate to Microsoft Entra ID.
- Select App registrations.
- Click New registration.
- Enter a name, for example:
github-cryoptix-api-deploy
- Leave the account type as:
Accounts in this organizational directory only
- Click Register.
After creation, note the following values:
- Application (Client) ID
- Directory (Tenant) ID
These values will be required later.
Within the App Registration:
- Select Certificates & secrets.
- Open the Federated credentials tab.
- Click Add credential.
Select:
Federated credential scenario:
GitHub Actions deploying Azure resources
Provide:
- GitHub Organization/User
- Repository Name
- Entity Type:
Branch - Branch:
main - Credential Name (for example
github-cryoptix-main)
Click Add.
Azure will now trust workflows running from the specified repository and branch.
The App Registration exists but cannot deploy resources until permissions are granted.
Recommended scope: Resource Group
- Open the Resource Group.
- Select Access Control (IAM).
- Click Add Role Assignment.
- Choose the Contributor role.
- Select User, group, or service principal.
- Search for the App Registration created earlier.
- Complete the assignment.
Navigate to:
Subscriptions → Your Subscription
Copy the Subscription ID.
Cryoptix is designed to run on Azure App Service using the B1 (Basic) pricing tier, which supports:
- Always On
- WebSockets
- Background Hosted Services
- SignalR
- Continuous real-time processing
In the Azure Portal:
- Create a new App Service
- Select a Resource Group (for example
Cryoptix-RG) - Specify an App Service name (for example
Cryoptix-API) - Runtime Stack:
.NET 10 - Region: Closest to your users
- Pricing Plan:
B1 (Basic)
Click Review + Create, then Create.
Within the App Service:
Configuration → General Settings → WebSockets
Enable WebSockets and restart the application.
Important
WebSockets must be enabled for SignalR and real-time exchange connectivity.
The workflow file .github/workflows/azure-app-service.yml is configured for manual deployment and is automatically available in GitHub Actions.
name: Azure App Service

on:
  workflow_dispatch:

permissions:
  contents: read
  id-token: write

jobs:
  build-and-deploy:
    runs-on: ubuntu-latest

    steps:
      - name: Checkout
        uses: actions/checkout@v4

      - name: Setup .NET
        uses: actions/setup-dotnet@v4
        with:
          dotnet-version: '10.0.x'

      - name: Restore
        run: dotnet restore src/api/Cryoptix.Web.API/Cryoptix.Web.API.csproj

      - name: Build
        run: dotnet build src/api/Cryoptix.Web.API/Cryoptix.Web.API.csproj --configuration Release --no-restore

      - name: Publish
        run: dotnet publish src/api/Cryoptix.Web.API/Cryoptix.Web.API.csproj --configuration Release -o "${{ github.workspace }}/publish" --no-build

      - name: Zip publish output
        run: |
          cd "${{ github.workspace }}/publish"
          zip -r "${{ github.workspace }}/api.zip" .

      - name: Login to Azure using OIDC
        uses: azure/login@v2
        with:
          client-id: ${{ vars.AZURE_CLIENT_ID }}
          tenant-id: ${{ vars.AZURE_TENANT_ID }}
          subscription-id: ${{ vars.AZURE_SUBSCRIPTION_ID }}

      - name: Configure App Service application settings
        env:
          AZURE_RESOURCE_GROUP: ${{ vars.AZURE_RESOURCE_GROUP }}
          AZURE_WEBAPP_NAME: ${{ vars.AZURE_WEBAPP_NAME }}
        run: |
          set -e

          # Map configuration keys to App Settings using __ to represent : in IConfiguration
          az webapp config appsettings set --resource-group "$AZURE_RESOURCE_GROUP" --name "$AZURE_WEBAPP_NAME" --settings \
            WEBSITES_INCLUDE_CLOUD_CERTS="true" \
            WEBSITES_CONTAINER_START_TIME_LIMIT="1800" \
            WEBSITES_PORT="8080" \
            ASPNETCORE_URLS="http://+:8080" \
            Auth__Domain="${{ vars.AUTH_DOMAIN }}" \
            Auth__Audience="${{ vars.AUTH_AUDIENCE }}" \
            Auth__Issuer="${{ vars.AUTH_ISSUER }}" \
            Auth__ClientIds__0="${{ secrets.AUTH_CLIENTID_0 }}" \
            Credentials__AccountName="${{ secrets.CREDENTIALS_ACCOUNT_NAME }}" \
            Credentials__ApiKey="${{ secrets.CREDENTIALS_API_KEY }}" \
            Credentials__ApiSecret="${{ secrets.CREDENTIALS_API_SECRET }}" \
            CorsOrigins__Policy="${{ vars.CORS_POLICY }}" \
            CorsOrigins__Urls="${{ vars.CORS_URLS }}"

      - name: Show Azure app settings
        env:
          AZURE_RESOURCE_GROUP: ${{ vars.AZURE_RESOURCE_GROUP }}
          AZURE_WEBAPP_NAME: ${{ vars.AZURE_WEBAPP_NAME }}
        run: |
          az webapp config appsettings list \
            --resource-group "$AZURE_RESOURCE_GROUP" \
            --name "$AZURE_WEBAPP_NAME" \
            --query "[?name=='ASPNETCORE_URLS' || name=='WEBSITES_PORT' || name=='PORT']"

      - name: Deploy to Azure Web App
        env:
          AZURE_RESOURCE_GROUP: ${{ vars.AZURE_RESOURCE_GROUP }}
          AZURE_WEBAPP_NAME: ${{ vars.AZURE_WEBAPP_NAME }}
        run: |
          az webapp deploy --resource-group "$AZURE_RESOURCE_GROUP" --name "$AZURE_WEBAPP_NAME" --src-path "${{ github.workspace }}/api.zip" --type zip

      - name: Logout of Azure
run: az logout || trueNavigate to:
GitHub → Repository → Settings → Secrets and variables → Actions
Create the following repository secrets:
| Secret Name | Value |
|---|---|
CREDENTIALS_ACCOUNT_NAME |
your_exchange_account_name |
CREDENTIALS_API_KEY |
your_exchange_account_api_key |
CREDENTIALS_API_SECRET |
your_exchange_account_api_secret |
AUTH_CLIENTID_0 |
your_auth0_client_ids |
Create the following repository variables:
| Variable Name | Value |
|---|---|
AUTH_DOMAIN |
your_auth0_domain |
AUTH_AUDIENCE |
your_auth0_api_audience |
AUTH_ISSUER |
your_auth0_api_issuer |
AZURE_RESOURCE_GROUP |
your_azure_resource_group |
AZURE_WEBAPP_NAME |
your_azure_webb_app_name |
AZURE_CLIENT_ID |
your_azure_client_id |
AZURE_TENANT_ID |
your_azure_tenant_id |
AZURE_SUBSCRIPTION_ID |
your_azure_subscription_id |
CORS_POLICY |
cryoptix-cors-policy |
CORS_URLS |
your_azure_static_web_app_url |
- Open GitHub Actions.
- Select Azure App Service.
- Click Run workflow.
- Select the target branch.
- Click Run workflow.
GitHub Actions will build, publish, configure, and deploy the ASP.NET Core Web API to Azure App Service.

Cryoptix is provided for educational and research purposes only.
Cryptocurrency trading involves substantial financial risk. Users are responsible for evaluating and testing any trading strategies before using them with real funds.
The authors and contributors of Cryoptix are not responsible for any financial losses incurred through the use of this software.
This project is licensed under the MIT License. See the LICENSE file for details.
- Support multiple exchanges
- Update strategy parameters in realtime
- Trading analytics
- Order execution