Wireless Serial
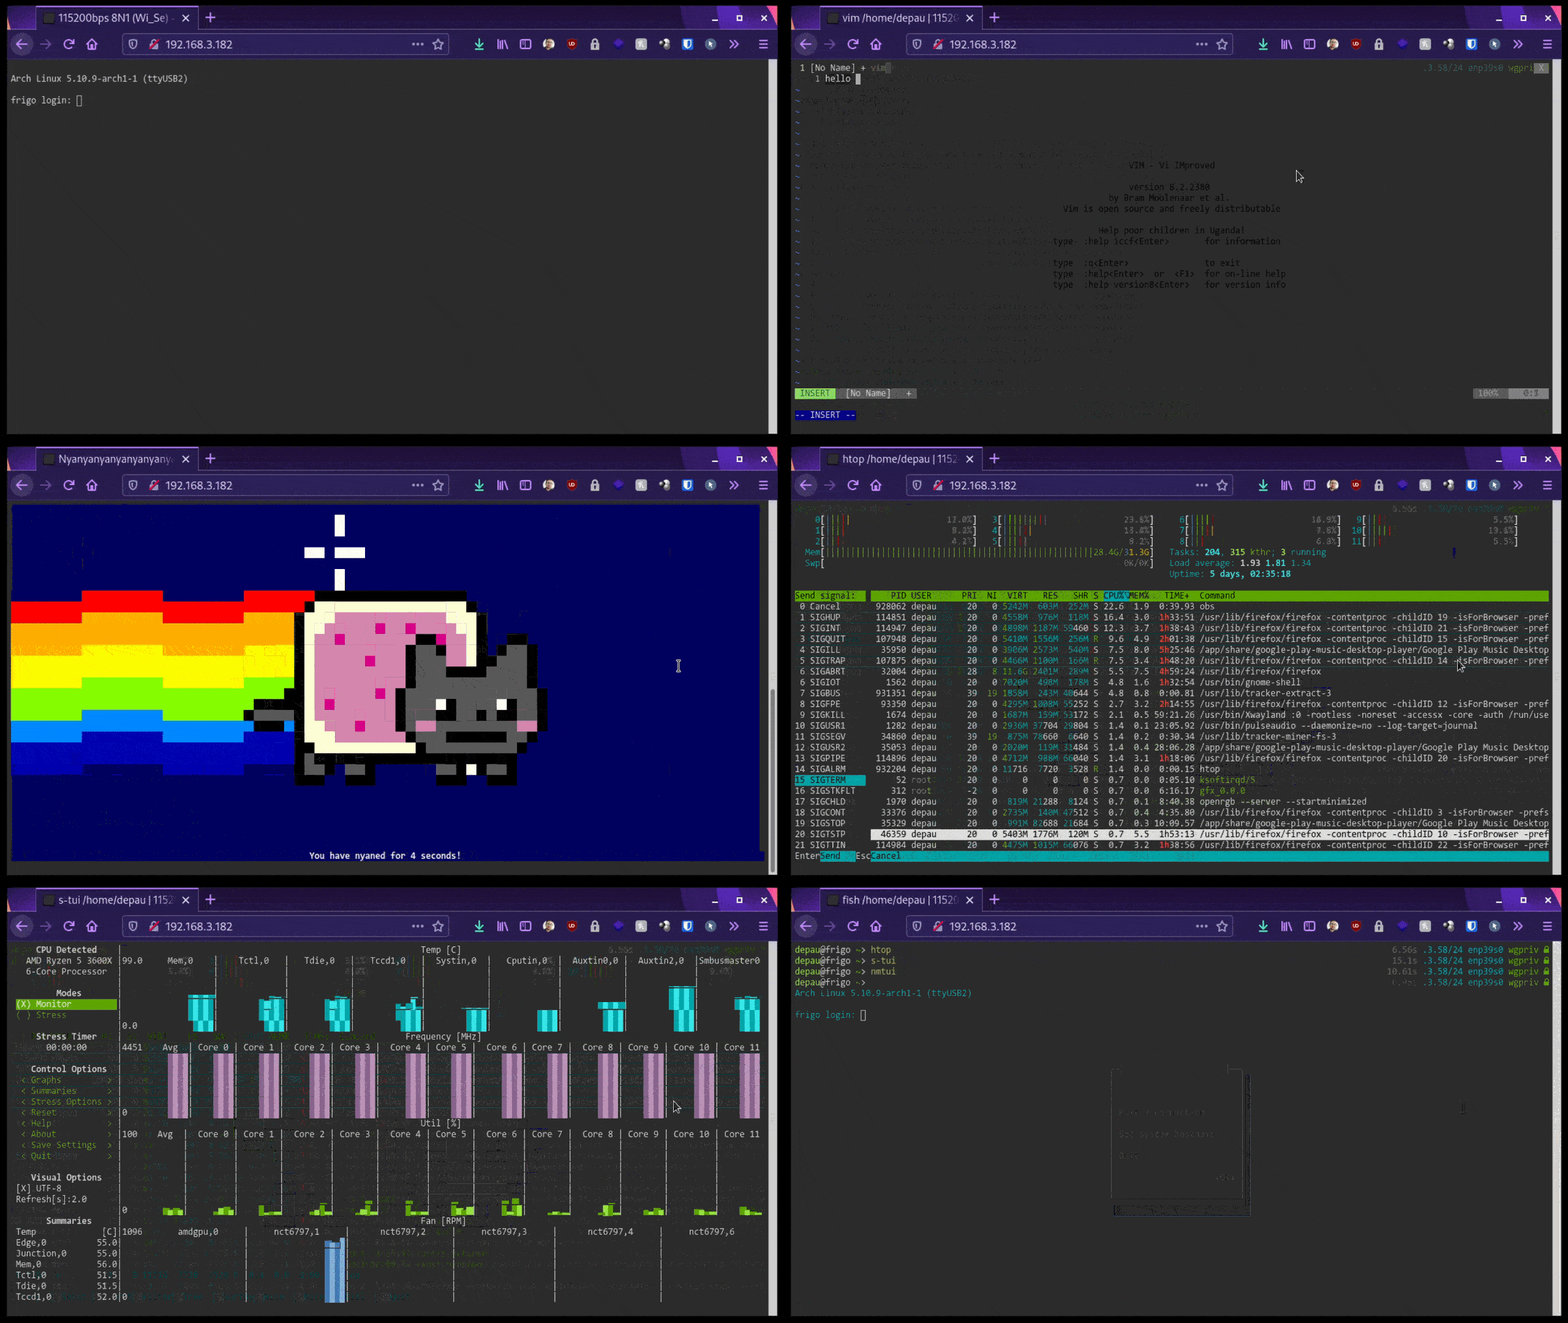
This software allows you to use an ESP8266 or ESP32 board as a remote UART terminal with GPIO port control and reading.
It is very fast, reaching (with caveats) up to 1500000bps rates.
It is intended as a firmware for the Wi-Se
boards (which you can order and build at your favorite PCB manufacturer),
though it will work just fine with a normal ESP8266 or ESP32 breakout board.
Communication occurs over WebSockets: it is compatible with
ttyd.
In fact, the web UI is the same. CLI clients compatible with ttyd, such as ttyc should also work with Wi-Se.
Wi-Se uses a superset of ttyd's protocol. Non Wi-Se-aware clients won't be able to use all features.
Wistty can be used to control remote terminal configuration parameters. It is part of ttyc: https://github.com/Depau/ttyc
- Web-based terminal based on Xterm.js
- Very low latency (~10ms on average, depending on your Wi-Fi)
- Relatively high baud rates are supported (up to ~1500000bps, with caveats)
- Zmodem support on Web UI
- Native *nix client:
ttyc - OTA firmware updates
- Automatic baud detection (ymmv)
- Remote terminal parameters can be changed on the fly
- Control an read GPIOs over Web UI
Building is only supported and tested on GNU/Linux x86_64.
Building on Windows is not supported. WSL may work but is not tested.
Building on macOS may work but it is not tested. Pull requests are welcome.
Requirements:
- PlatformIO Core (installation instructions)
- Python 3.8+
The build script also has some additional Python dependencies: pyjq, jinja2, pyyaml.
You may install them through your distro package manager or use a virtualenv as described here:
python3 -m venv venv
source venv/bin/activate
pip install -r requirements.txt
To build and flash the project:
-
Inside
configs/, copyconfig.yml.exampletodevice_name.ymland change configuration parameters as needed.- The serial port or IP address for OTA updates must be specified in the config file.
-
Activate Python virtualenv:
source venv/bin/activate -
Build and upload:
./builder.py upload              # To flash all configured devices
./builder.py upload device_name  # To flash only using "device_name.yml"
The builder.py script makes it easy to keep a number of devices up-to-date, without having to swap config files.
The platformio.ini and include/config.h files are automatically generated by the build script based on each single human-readable YAML
config.
For development you can change config options in configs/config.yml.example, then
run ./builder.py devconf --example to generate the headers in-place.
To build the frontend, and use real esp board you need to follow these steps:
- Install required packages.
cd /html nvm install v24.6.0 yarn install - For direct connections change host variable in
html/src/components/app.tsx// Set to IP of your board! const host = window.location.host; - For proxy connections change target in
html/webpack.config.js(if you don't touch above host variable!)// Set http://IP:PORT of your board in // devConfig.devServer.proxy.target proxy: [{ context: [ '/token', '/stty', '/gpio', '/stats', '/heap', '/reset', '/whoami', '/ws' ], target: 'http://localhost:7681', ws: true }] - Uncomment
cors_allow_origin: "*"in configuration file and reflash esp. - Start frontend server and proxy by
yarn run start - Do other changes in
/htmldirectory. - After completing the work, restore the above host/target variable and cors settings.
- Run
yarn run build, to compile the inlined html to../src/html.h.
To build the frontend, and use fakeesp.js test server you should follow these steps:
- Install required packages like above.
- Start frontend server and proxy by
yarn run start - Start backend server by
yarn run fakeesp - Do other changes in
/htmldirectory and runyarn run buildat the end.
Configuration is located under configs/.
An example config config.yml.example is provided, with comments and all options set to their default values.
Runtime configuration changes are not supported and will not be supported.
This helps keep the code simple and reduce security and memory corruption issues.
Pushing a OTA firmware update to change the configuration is simple enough.
UART parameters can be changed at runtime, but the original configuration will be restored in case of restart.
UART settings can be changed using the following methods:
-
Through your browser by clicking on the gear icon.
-
Through
wistty(part ofttyc), whilettycsupports direct setting of UART parameters. -
Via RESTful API by sending a POST request:
curl -X POST IP_ADDRESS/stty -H 'Content-Type: application/json' \
-d '{"baudrate":1500000,"bits":8,"parity":null,"stop":1}'

# To fetch current setting:
curl IP_ADDRESS/stty

# For authentication, add:
--digest --user username:password
Bits (data bits) can be
5,6,7or8, and it must not be8if parity is not none.Parity can be
null(none),0(even),1(odd).Stop (stop bits) can be
0,1,2.Defaults (
8,null,1) will work for most setups.You don't have to provide all the parameters, you can provide only the parameters you want to change, for example
{"baudrate": 115200}.
GPIO pins can be controlled and read using the following methods:
-
Through your browser by clicking on the autogenerated buttons.
-
For inputs, you will receive automatically generated LED indicators on the right side of the header bar.
-
For outputs, you will receive automatically generated buttons on the left side.
-
-
Via RESTful API by sending a POST request:
curl -X POST IP_ADDRESS/gpio -H 'Content-Type: application/json' \
 -d '{"ps_on":14000, "reset":16000}'

# To fetch current configured gpios:
curl IP_ADDRESS/gpio

# For authentication, add:
--digest --user username:password
Similar to uart you don't have to provide all names.
The software recognizes 3 states after setting a given gpio.
- 0 means off
- 1 means permanently on
- >1 means on for a specified time in ms
In all cases, the
invertedflag is honored to set/get the port to/from active low/high state.More details and all options can be found in the configuration file.
ESP8266 has incredible capabilities, but fast Wi-Fi isn't one of them.
The UART works fine with baudrates higher than 1.5 mbps (1500000 bps), however average Wi-Fi transfer speed is usually around 900 kbps.
To get best performance:
- Avoid the UART to USB adapter built into most ESP8266 devkits (but rather use a better external adapter such as those based on FTDI chips)
- The built-in adapter won't go faster than ~500000bps
- Enable software flow control and make sure it is supported by and enabled on the connected device
- Avoid sending constant streams of data at high rates if flow control cannot be enabled
This firmware implements UART software flow control and it is enabled by default.
With software flow control, Wi-Se asks the connected UART device to momentarily suspend the data transfer (IXON/IXOFF) when the Wi-Fi can't keep up.
This will improve reliability at high speeds by orders of magnitude.
See the next section on how to ensure flow control is enabled on Linux-based devices
Linux supports flow control and it is usually enabled by default. Some shells (such as fish) disable software flow control on start.
fish versions prior to 3.2.0 do not support enabling it.
From 3.2.0, fish will still disable flow control on start up, but it will respect your choice if you enable it in your configuration file.
bash and zsh usually don't mess with it. However, some "plug-ins" may disable it.
Add the following at the end of your shell configuration file to ensure it is enabled when you login from a terminal.
~/.bashrc, ~/.zshrc, etc.
tty | grep -qE '/dev/tty[A-Za-z]+[0-9]*' && stty ixon ixoff~/.config/fish/config.fish
string match -rq '/dev/tty[A-Za-z]+\d*' (tty) && stty ixon ixoffIf you wish, you can run a shell for the usb port.
To do so, run sudo setsid agetty -L 115200 ttyUSB0 vt100 or without login bash < /dev/ttyUSB0 > /dev/ttyUSB0 2>&1
After it you will see regular shell:
Ubuntu 22.04.4 LTS nec ttyUSB0

login: ***
password: ***
Welcome to Ubuntu 22.04.4 LTS (GNU/Linux 5.15.0-151-generic x86_64)

 * Documentation:  https://help.ubuntu.com
 * Management:     https://landscape.canonical.com
 * Support:        https://ubuntu.com/pro
To enable colors do export TERM=xterm
To resize terminal call stty rows 80 cols 240
If your application crashes frequently, you can use the following methods to find out why.
- Jump into
.builder/genericand callpio device monitor -e wi_se
$pio device monitor -e wi_se

Please build project in debug configuration to get more details about an exception.
See https://docs.platformio.org/page/projectconf/build_configurations.html


--- Terminal on /dev/ttyUSB1 | 115200 8-N-1
--- Available filters and text transformations: colorize, debug, default, direct, esp8266_exception_decoder, hexlify, log2file, nocontrol, printable, send_on_enter, time
--- More details at https://bit.ly/pio-monitor-filters
--- Quit: Ctrl+C | Menu: Ctrl+T | Help: Ctrl+T followed by Ctrl+H
This will trigger a terminal containing exception_decoder to help decode the cause.
You might have pressed Ctrl+S and triggered flow control by mistake. If you're using ttyc you can press Ctrl+Q to unlock it.
If you're using the web client, this can close the browser, depending on which one you use.
Chrome browser seems to ignore Ctrl+Q and pass it like it is, at least Linux version.
Firefox will ask you to close the page, but you can disable this shortcut.
Read more about how to do it on how-to-disable-ctrlq-shortcut-in-firefox thread.
Current version of wi-se web client will send Ctrl+Q on each press of Ctrl+`to unlock your terminal.
Another possible reason is that the firmware crashed.
When the firmware crashes, the UART goes out of control until execution restart.
This may result in sending a "break condition", which causes agetty to switch to the next baud rate.
If you're using ttyc you can attempt to manually send more breaks, until the terminal becomes responsive again,
or try to perform an automatic baud detection. Every time you send a break, agetty will try the next baud rate.
Note that if the current console is enabled for kernel messages and SysRq is enabled you have to send a break twice in a row.
As a workaround you can change, on connected device, the options passed to agetty and configure it to use a single baudrate.
On systemd-based distributions you can run sudo systemctl edit serial-getty@ttyXXX.service
(you can retrieve the TTY by running tty), then add
[Service]
ExecStart=
ExecStart=-/sbin/agetty -o '-p -- \\u' --keep-baud 115200,57600,38400,9600 %I $TERM
Change the baudrate to whatever you like, then sudo systemctl restart serial-getty@ttyXXX.service.
Software flow control is disabled or not supported/enabled on the connected device. See if running stty ixon ixoff on the remote device
makes any difference.
If you can't enable flow control on the connected device, try with low baud rates.
Another issue can be in your browser and/or graphic driver.
In my case I had to disable hardware acceleration in Firefox and restart it,
because not all characters were always visible in the terminal.
Interestingly, after re-enabling hardware acceleration, the terminal still worked correctly.
Always go to xtermjs.org and check there that the terminal is displaying correctly.
In case of crashes or restarts, esp tends to send bootlog/stacktrace messages into uart output.
To mitigate this problem, the following circuit can be used:
                  2 x Schottky diodes 1N5819 or BAS85 (1n4148 won't work!)
3v3 ---[1k]---,       /
tx_en --------*---(>|)---,
gnd ---[1k]--------------|
esp8266_tx -------(>|)---*---> RX_TARGET
Then the gpio for uart.uart_comm.tx_en need to be defined in configuration file.
Wi-Se boards come with 4 LEDs:
| LED | Color |
|---|---|
| Wi-Fi | Blue |
| Status | Yellow/Amber |
| TX | Red |
| RX | Red |
Connecting to Wi-Fi.
Connected and operating normally.
Operating normally, but flow control is currently blocked. If the status LED doesn't turn off within 0.5 sec there might be a bug.
It is normal for flow control to occur regularly when there is a lot of terminal activity. However, if it gets stuck turned on it might be the symptom of another issue.
Terminal activity:
- TX blinks ⇒ WebSocket to UART
- RX blinks ⇒ UART to WebSocket
Device error:
- OTA update failed (ensure the OTA host port is enabled in your firewall - OTA requires the devices to be mutually reachable)
- When in Wi-Fi station (client) mode: disconnected from the wireless network
The device will restart after around 1 second.
When performing OTA, the device will switch to "Christmas tree lights mode" and show a series of animations to report the current status.
- OTA start: LEDs turn on one at a time, twice, in sequence RX, TX, Status, Wi-Fi
- OTA progress: the LEDs will act as a firmware download progress bar
- OTA error: RX/TX LEDs blink slowly
- OTA success: RX, TX and status LEDs will turn off in sequence, Wi-Fi LED will stay on. The device will restart after ~3 sec into the new firmware.
This project is licensed under the GNU General Public License v3.0.
All content under /html was originally written for
ttyd, and it has been slightly modified.
ttyd is licensed under MIT license.
See the git commit history for the /html directory for original authors credits.
See fakeesp/README.md for licensing info for the ESP SDK and libraries mocks.